How do I enroll in ADSelfService Plus?
ADSelfService Plus authenticates your identity using the information you provide during the enrollment process. Enrollment is mandatory if you want to reset your password or unlock your accounts using ADSelfService Plus.
Note: Your admin might choose to enforce any or all the authentication techniques available in ADSelfService Plus. Based on that, you'll be required to provide the required information.
Enrollment using security question and answers
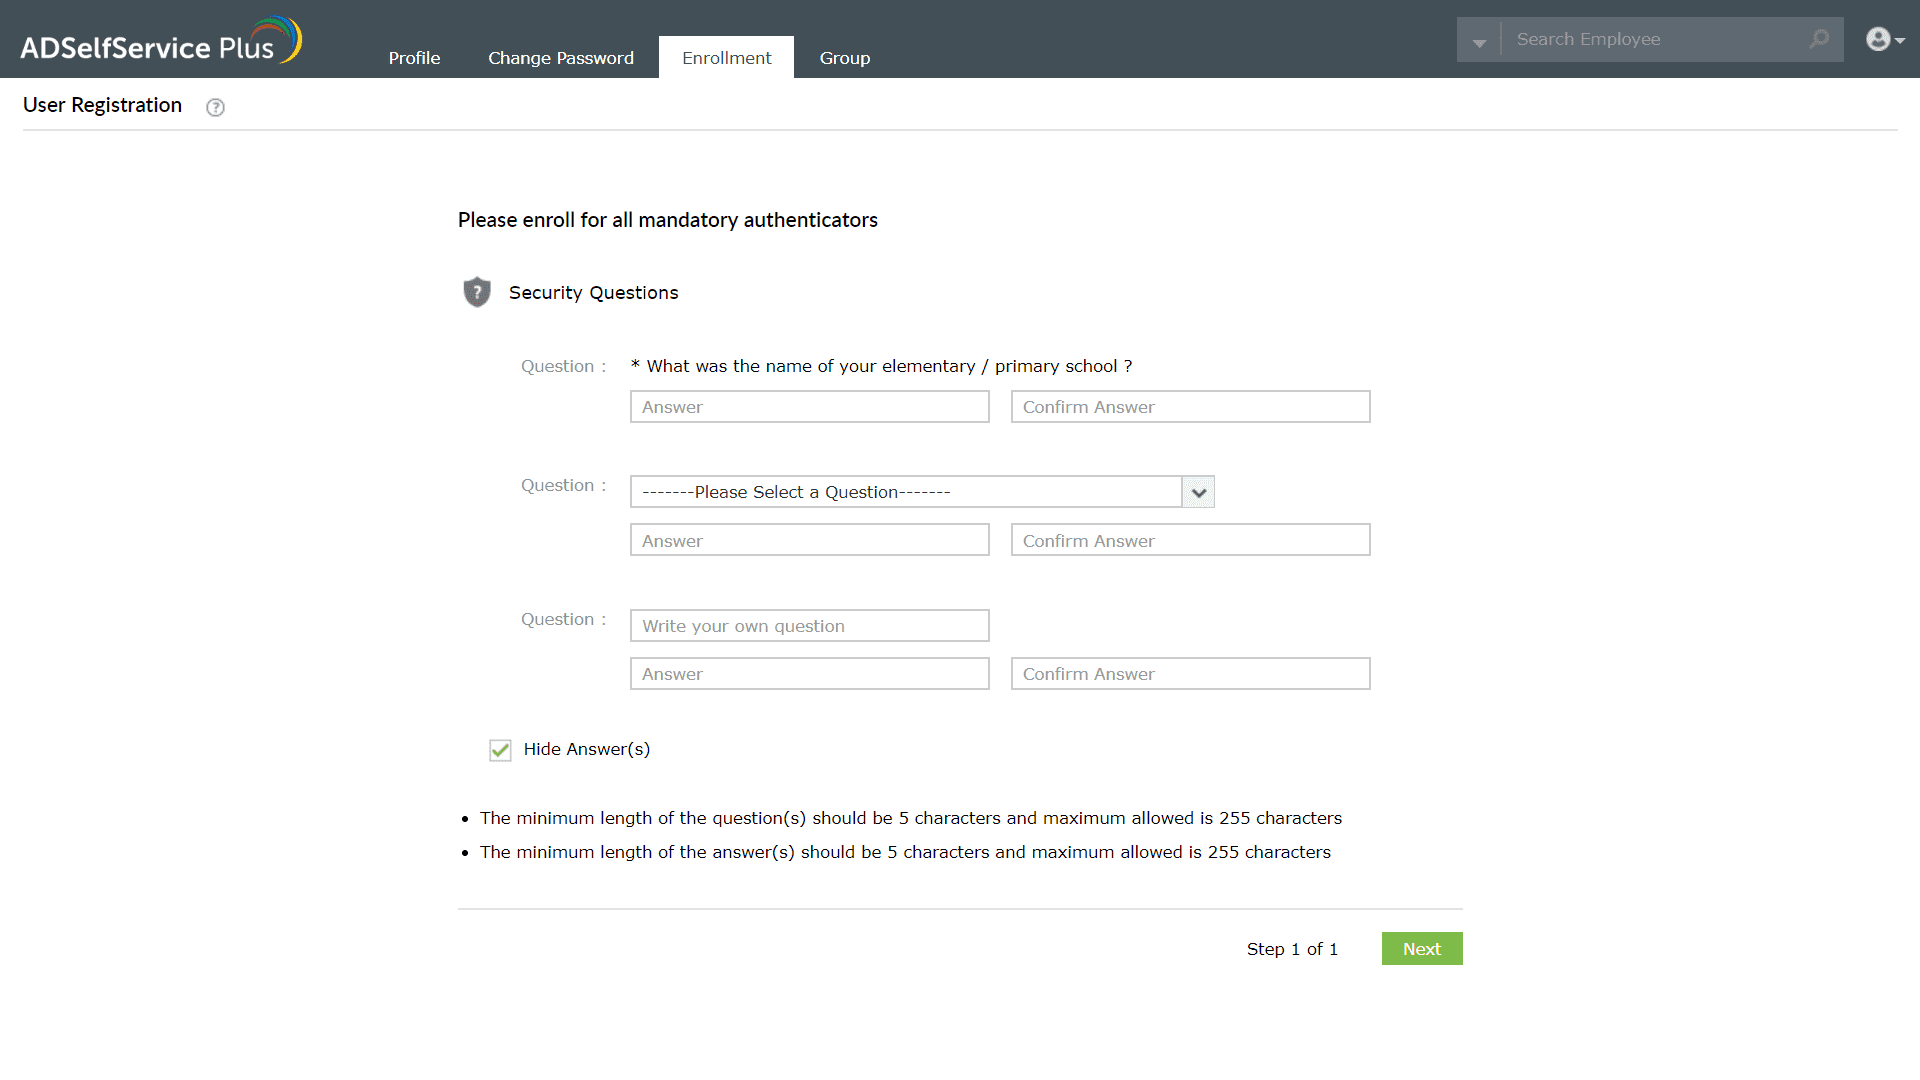
- In the ADSelfService Plus’ user portal, go to Enrollment tab → Security Questions.
- Any of these three windows will open.
- Mandatory security questions: Your administrator would have already configured the security questions. All you have to do is provide appropriate answers.
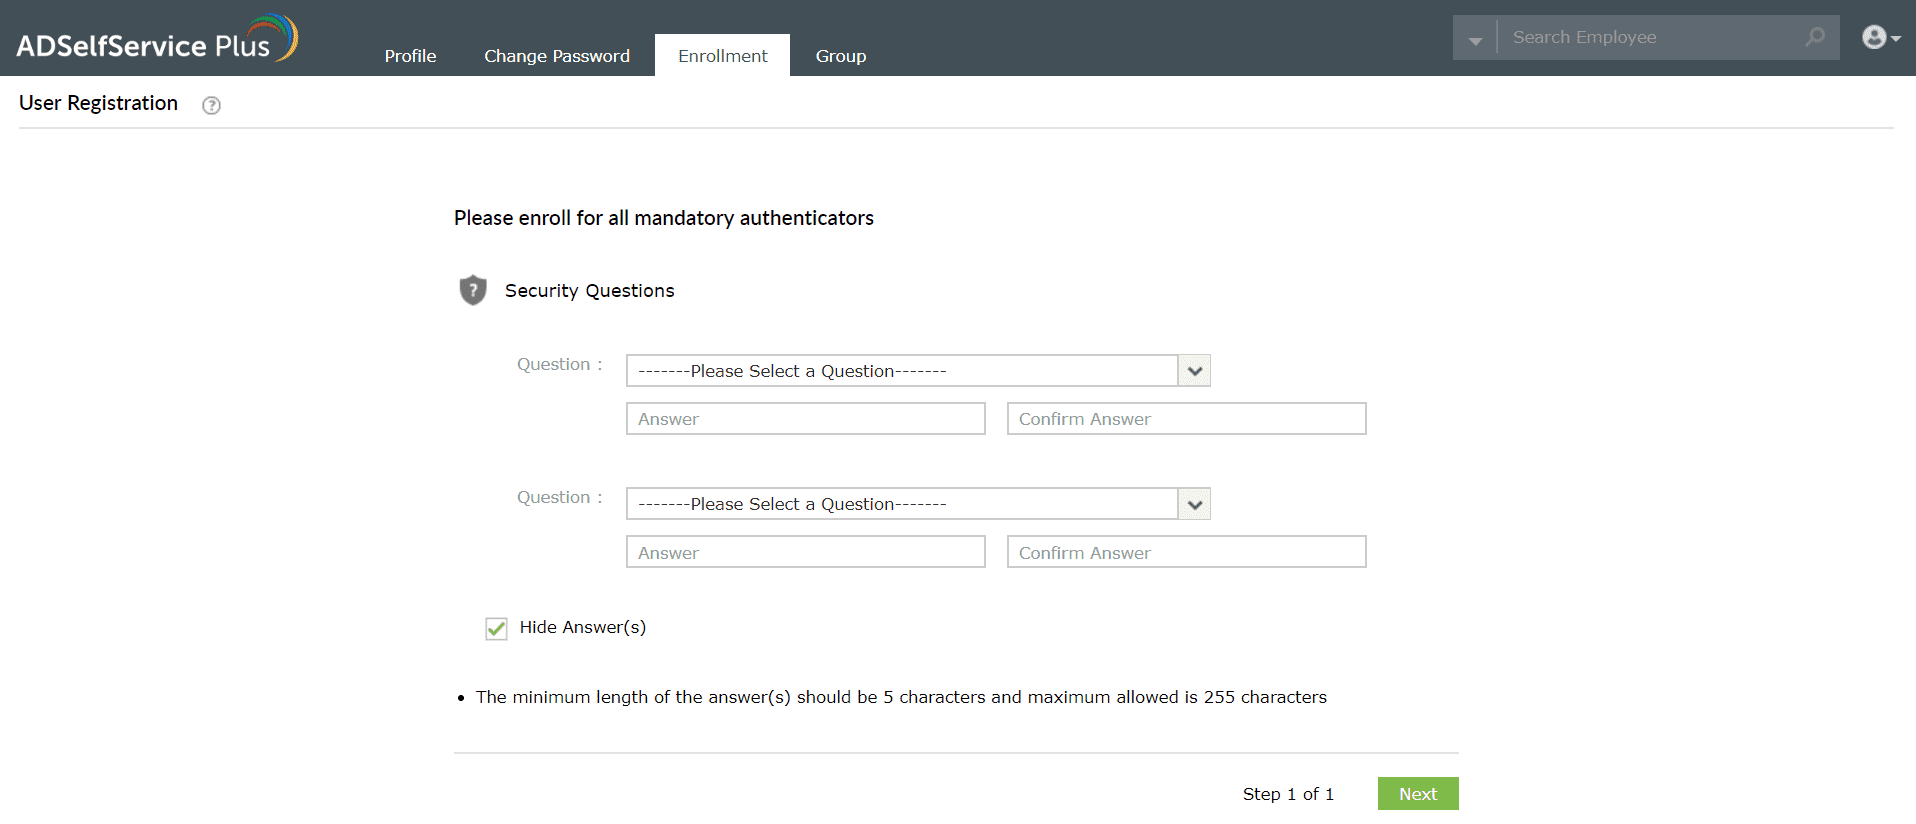
- Custom security questions: Configure your own security questions and provide appropriate answers.
- Select a question from the list: A set of security questions defined by your administrator will be displayed. You choose the questions using which you wish to be authenticated and provide appropriate answers.
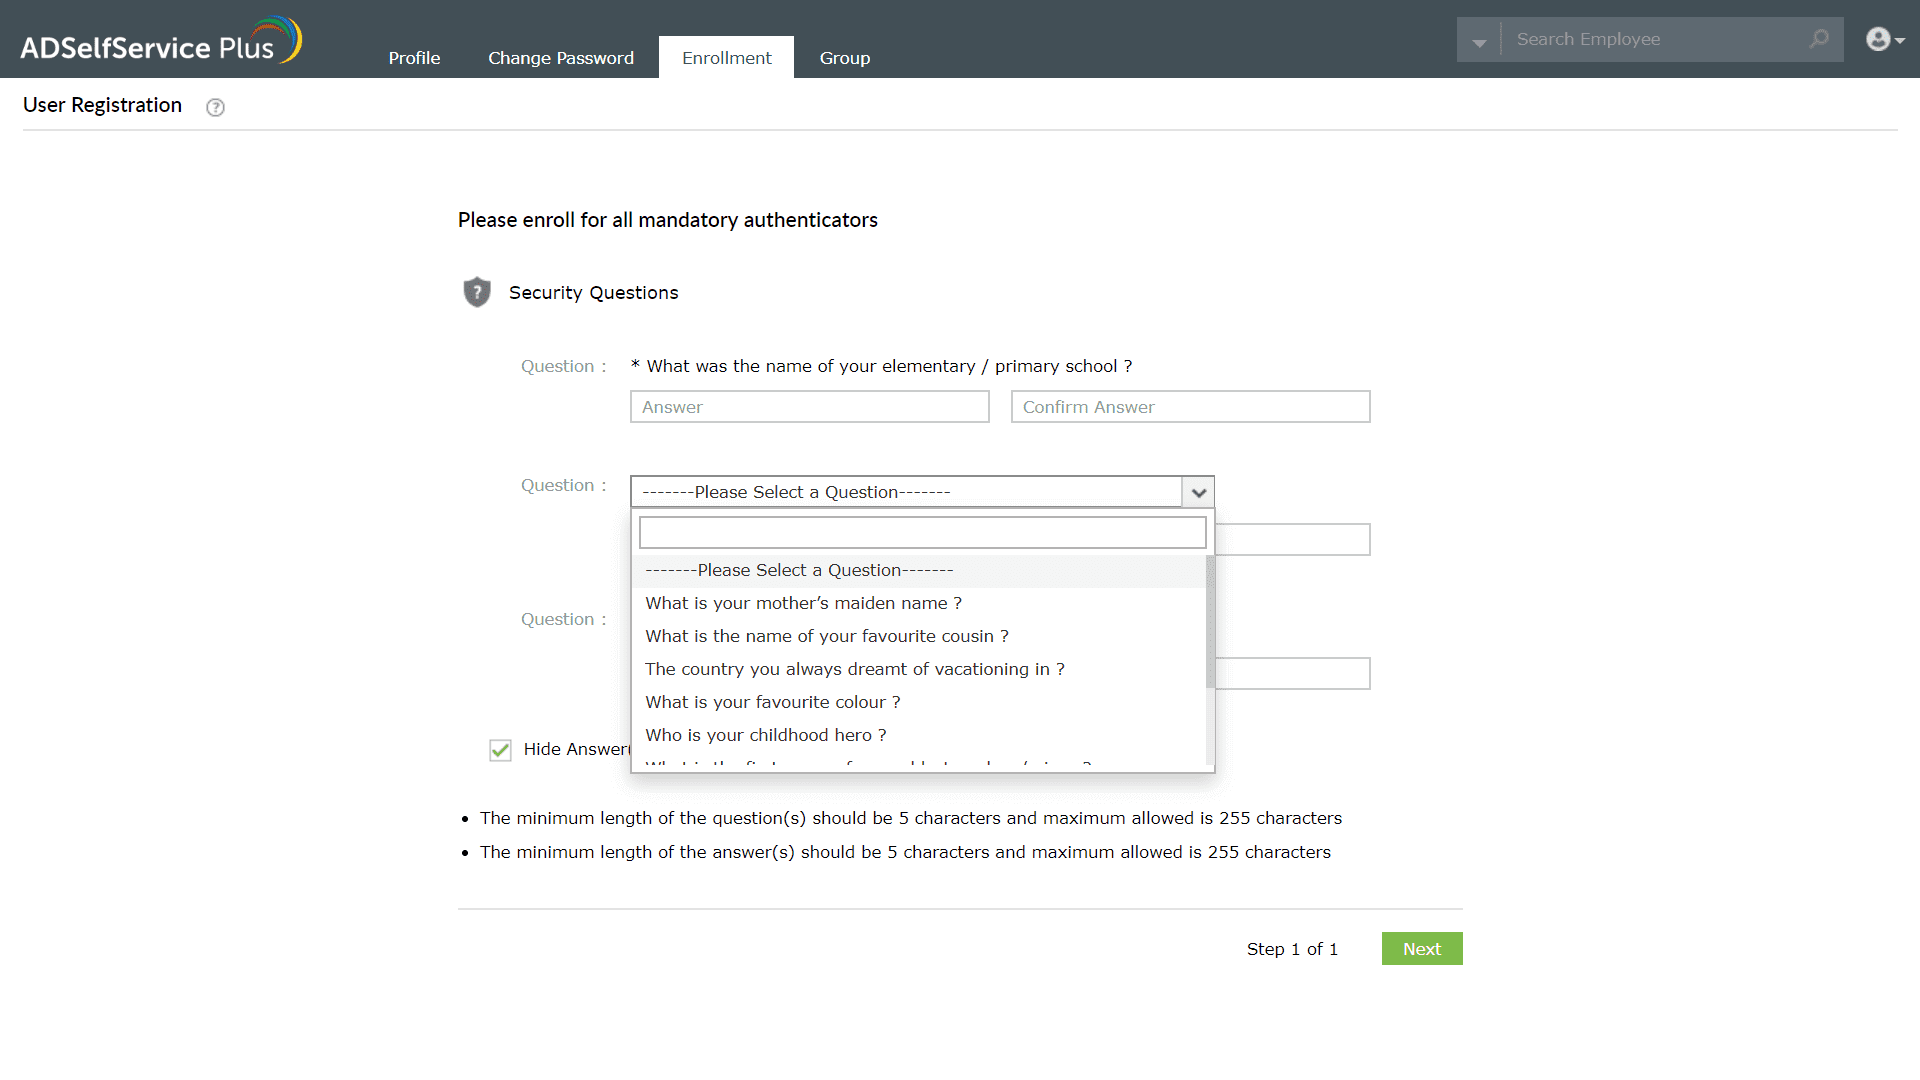
- Click Next.
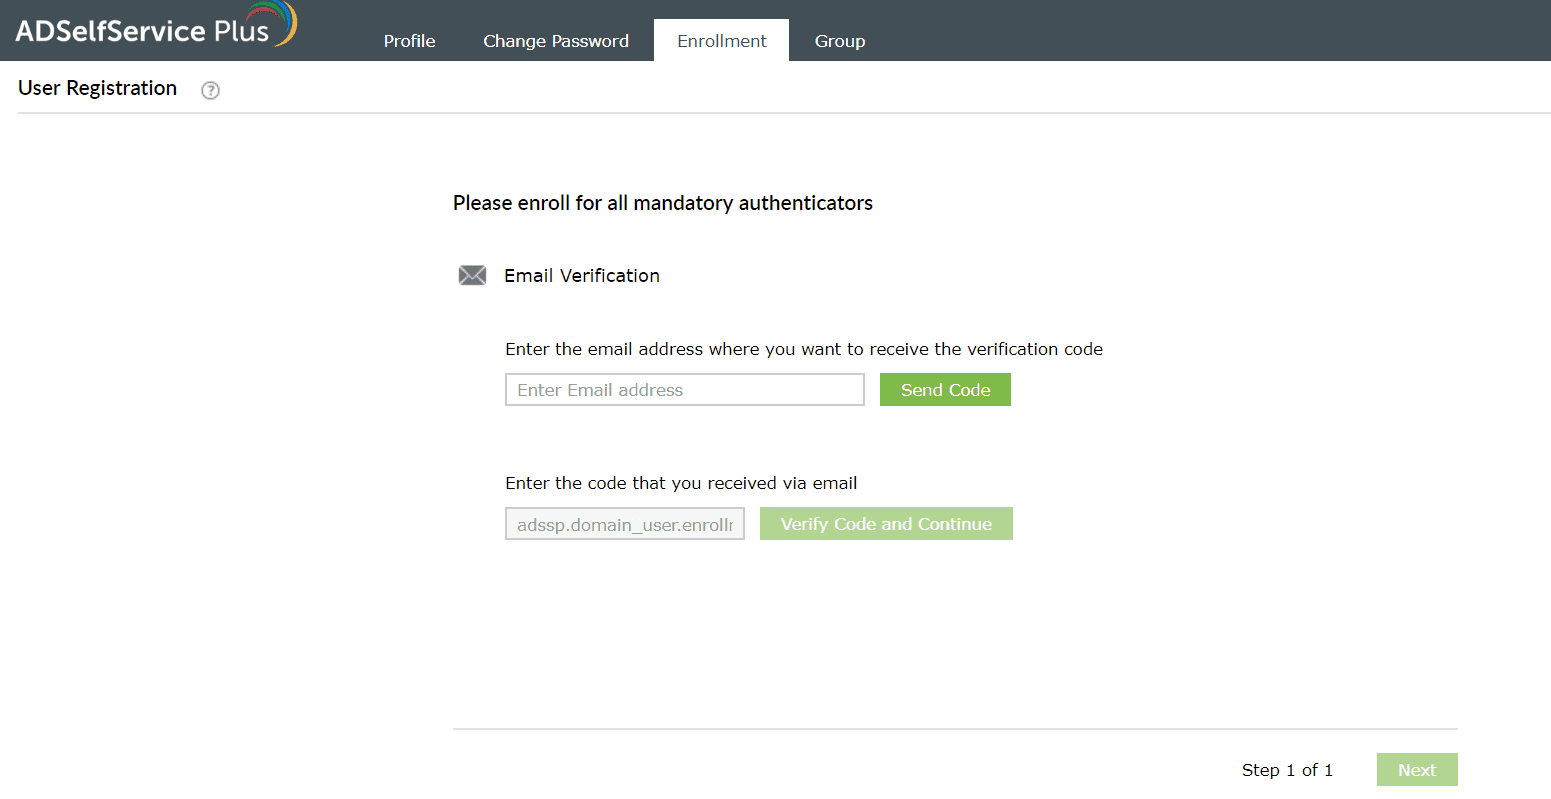
Enrollment using email address
Get verification code via email ID
- In the ADSelfService Plus’ user portal, go to the Enrollment tab → Email verification
- Enter your email ID.
- Verify the entered email ID by entering the verification code sent to your mail.
- Click Next.
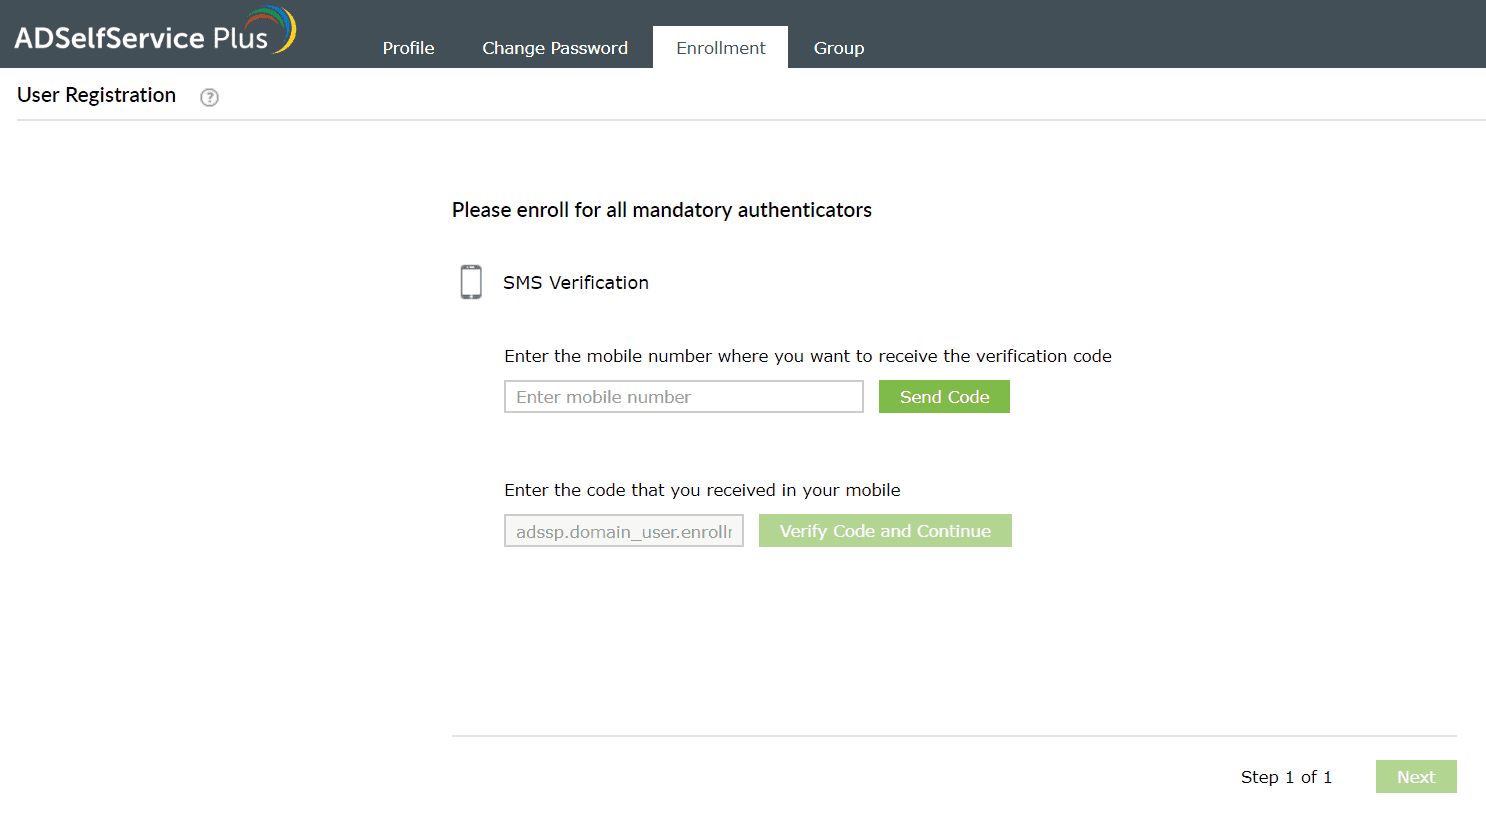
Enrollment using Mobile numbers
Get verification code via mobile number
- In the ADSelfService Plus’ user portal, go to Enrollment tab → Mobile Verification
- Enter your mobile number.
- Verify the entered mobile number by entering the verification code sent to your device.
- Click Next.
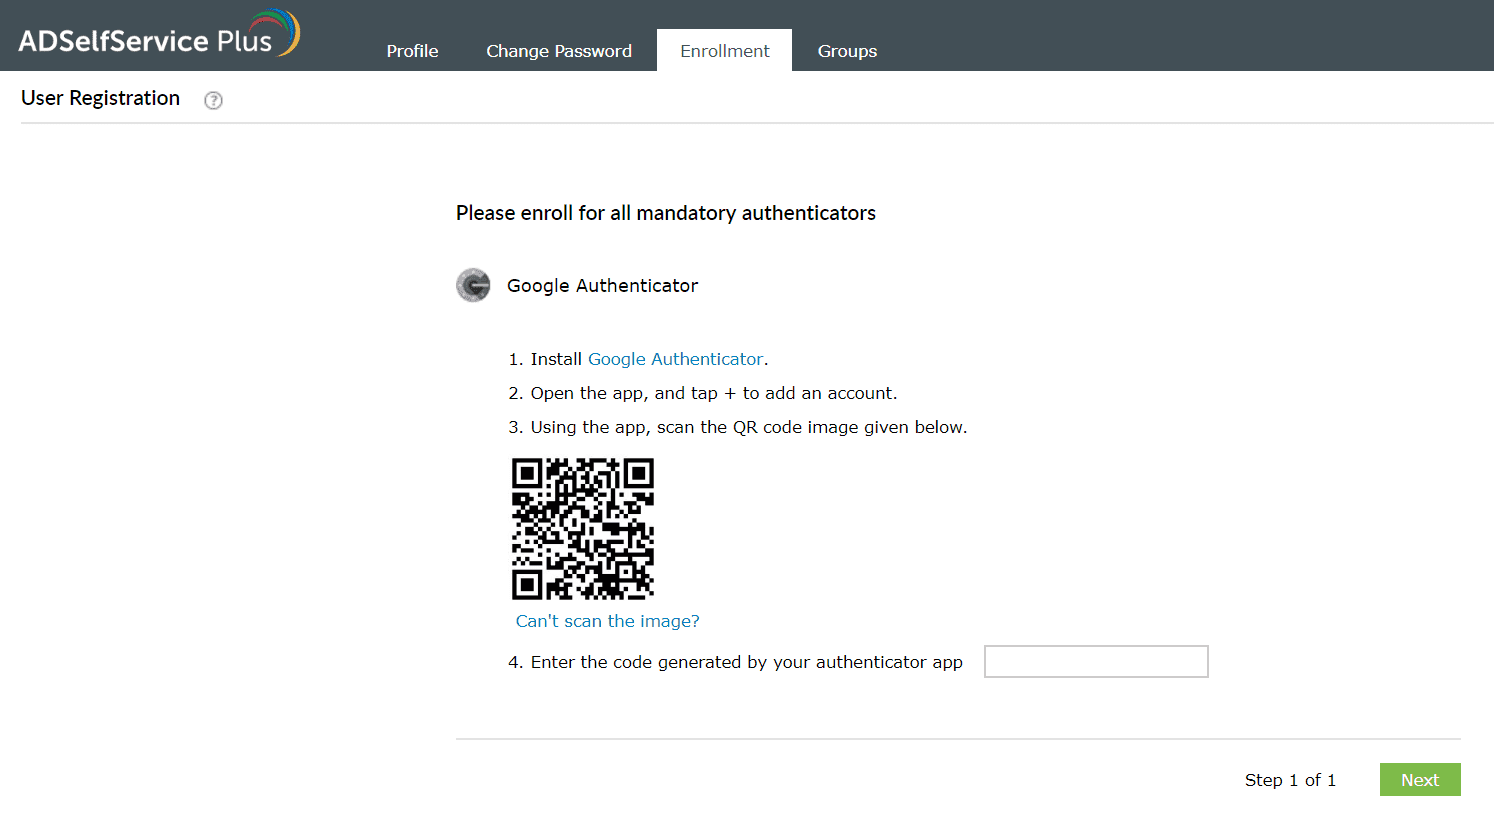
Enrollment using Google Authenticator
Prerequisite:
- Download Google Authenticator app in your mobile device from the Play Store or the App Store.
Configuration steps:
- In the ADSelfService Plus’ user portal, go to Enrollment tab → Google Authenticator. A barcode will be displayed.
- Go to Google Authenticator app in your mobile. Select Scan barcode and scan the displayed barcode.
- If that method fails, click Can't scan it? link. A set of numbers will be displayed.
- Go to Google Authenticator app in your mobile. Select Manual entry → enter the displayed numbers in the app.
- A one-time-passcode is generated in the app. Type that value in the Enter code field.
- Click Next.
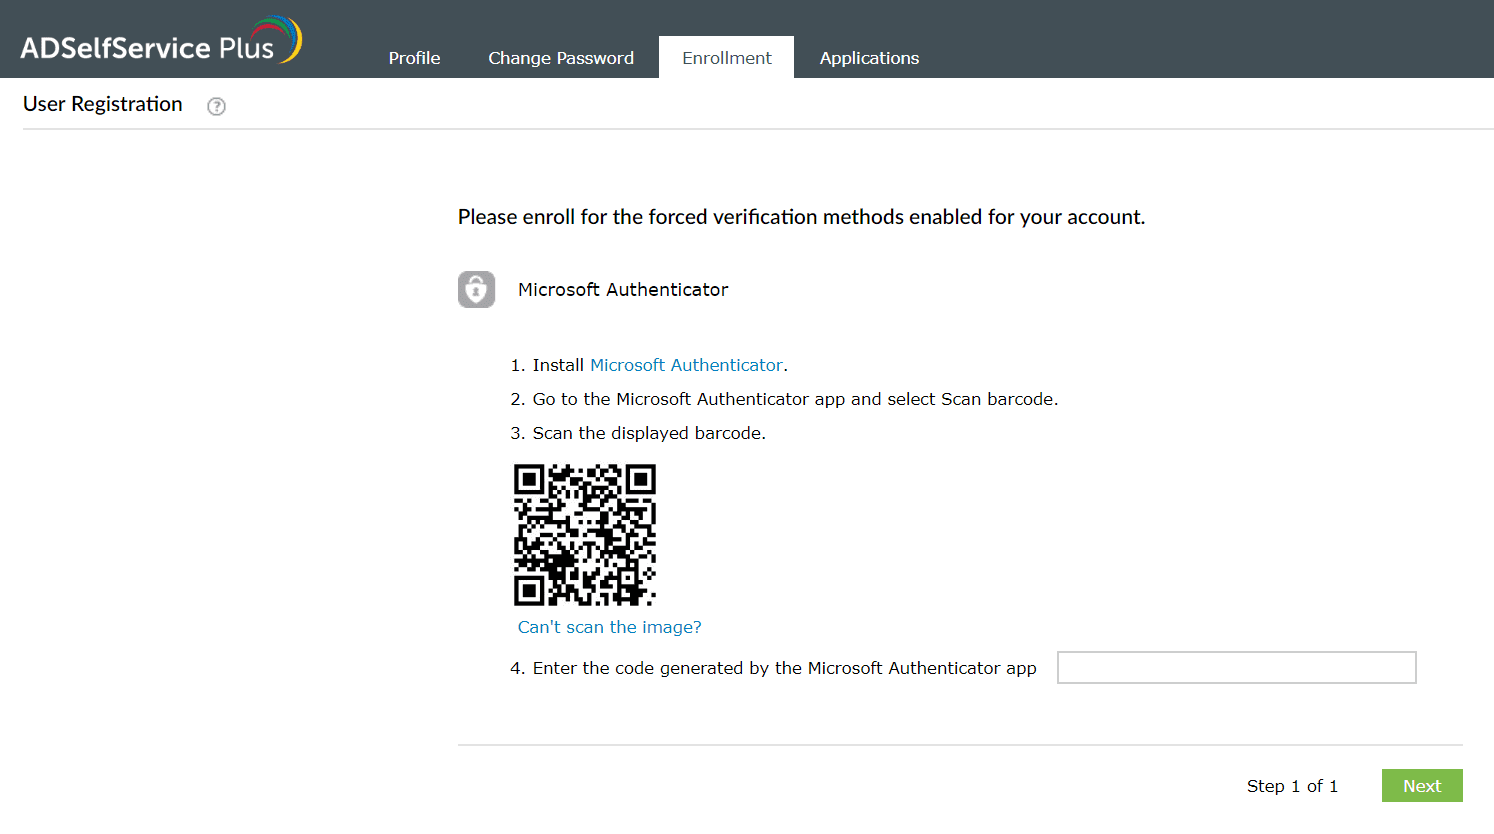
Enrollment using Microsoft Authenticator
Prerequisite:
- Download the Microsoft Authenticator app on your mobile device from the Google Play Store or the Apple App Store.
Configuration steps:
- In the ADSelfService Plus’ user portal, go to Enrollment → Microsoft Authenticator. A barcode will be displayed.
- Go to Microsoft Authenticator app in your mobile. Select Scan barcode and scan the displayed barcode.
- If that method fails, click Can't scan it? link. A set of numbers will be displayed.
- Go to Microsoft Authenticator app in your mobile. Select Add account → Other (Google, Facebook, etc.) → OR ENTER CODE MANUALLY. Enter the Account name (something to identify your account, say, ADSSP) and type the Secret Key displayed below. One-time-passcode is generated.
- Switch to the user portal and type the one-time-passcode in the Enter code field.
- Click Verify Code.
Enrollment using Yubikey Authenticator
Prerequisite:
- Enrolling through a workstation: Plug in the Yubikey device to your workstation. Place the cursor in the field below and press/hold the button on the plugged-in Yubikey device depending on the slot configured. The code is automatically updated.

- Enrolling through a mobile device: If you are using an NFC-enabled mobile device, simply tap the Yubikey device against your mobile. Copy the displayed passcode and paste it in the field below.

- Click Next.
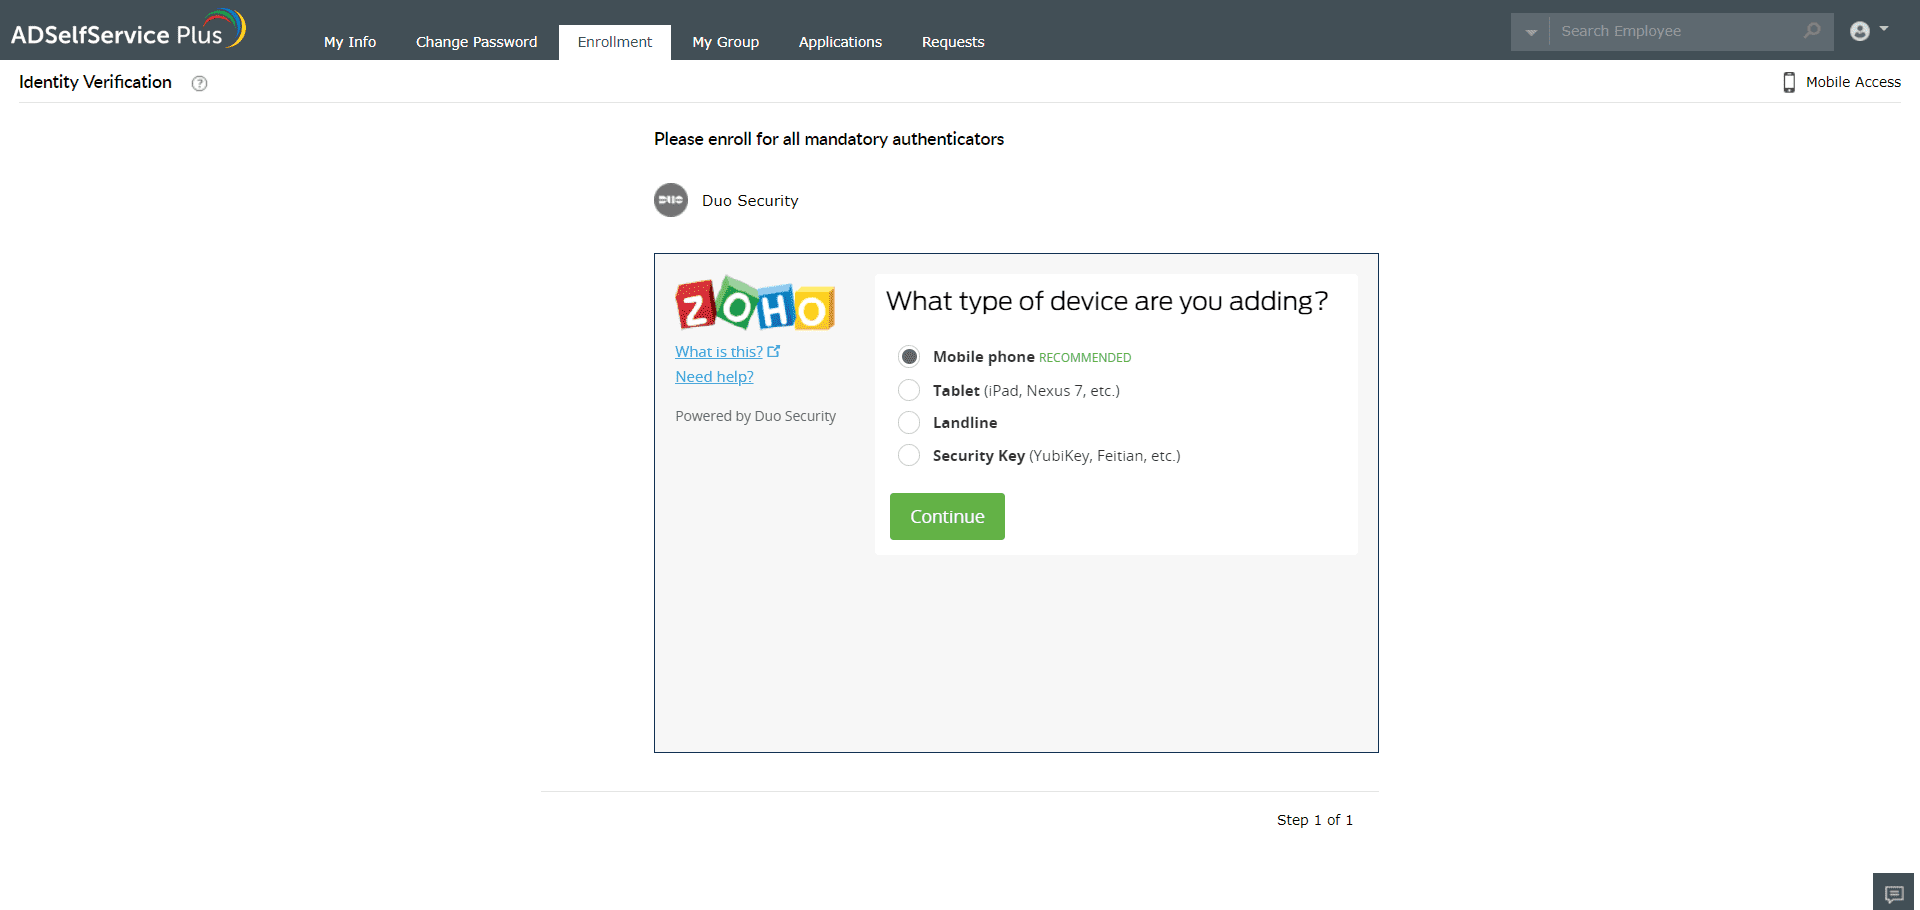
Enrollment using DUO Security
- In the ADSelfService Plus’ user portal, go to Enrollment tab → DUO Security.
- Follow the steps given in the webpage.
- Click Next.
Enrollment using RSA SecurID
For RSA Authentication, enrollment is not required from ADSelfService Plus portal. Please contact your administrator for the RSA hardware token that is mapped to your account.
Enrollment using RADIUS Authentication
For RADIUS Authentication, enrollment is not required from ADSelfService Plus portal. Please contact your administrator for the RADIUS password that is mapped to your account.
Enrollment using SAML Authentication
For SAML Authentication, enrollment is not required from ADSelfService Plus portal. Please contact your administrator to receive the identity provider credentials that is mapped to your account.
Enrollment using AD Security Questions
For utilizing AD Security Questions method of authentication, you are not required to enroll from ADSelfService Plus portal. If you are unsure about the answers for the displayed AD security questions, please contact your administrator.
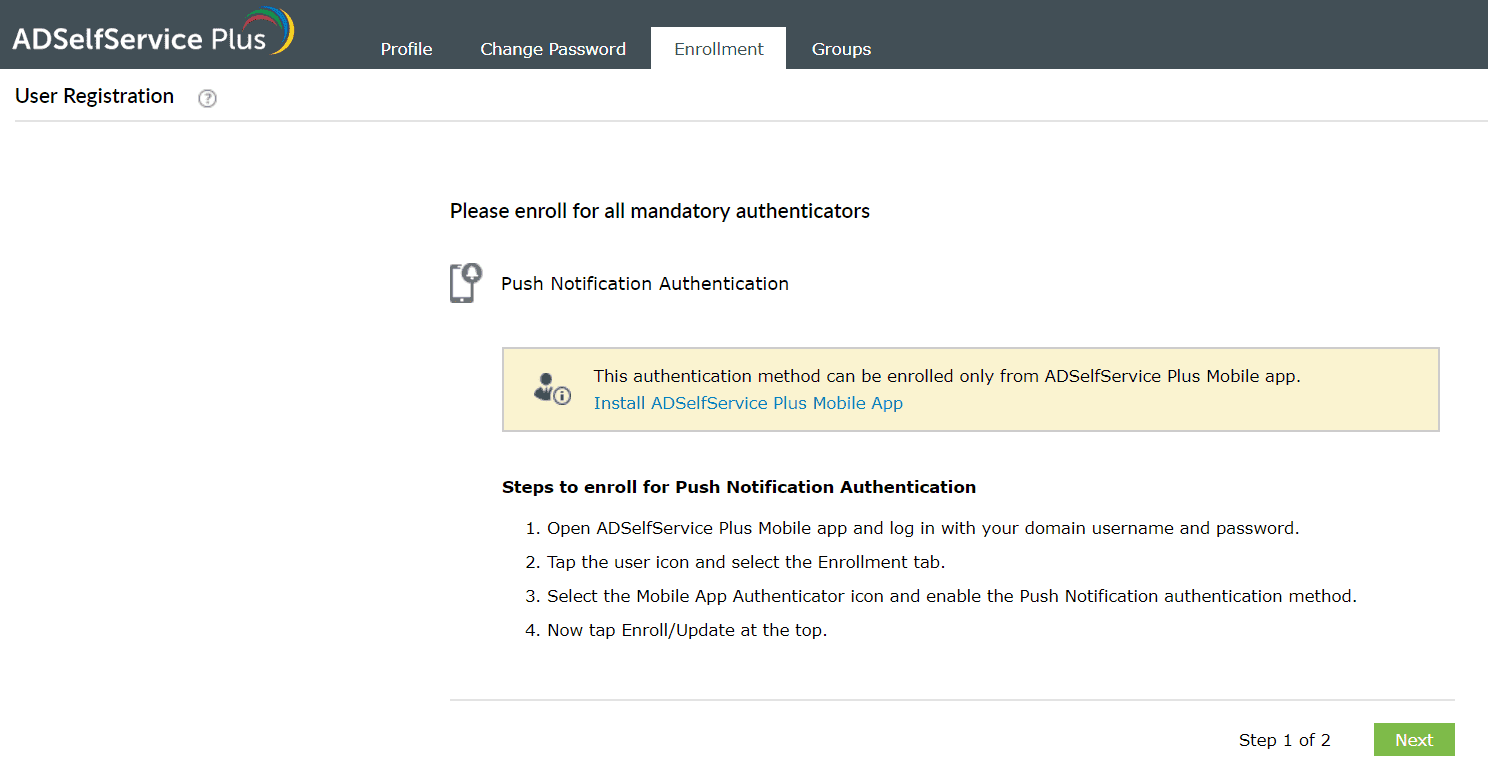
Enrollment using Push Notification Authentication
- Log in to the ADSelfService Plus mobile app > click Enrollment → Push Authentication.
- Follow the steps displayed in the webpage.
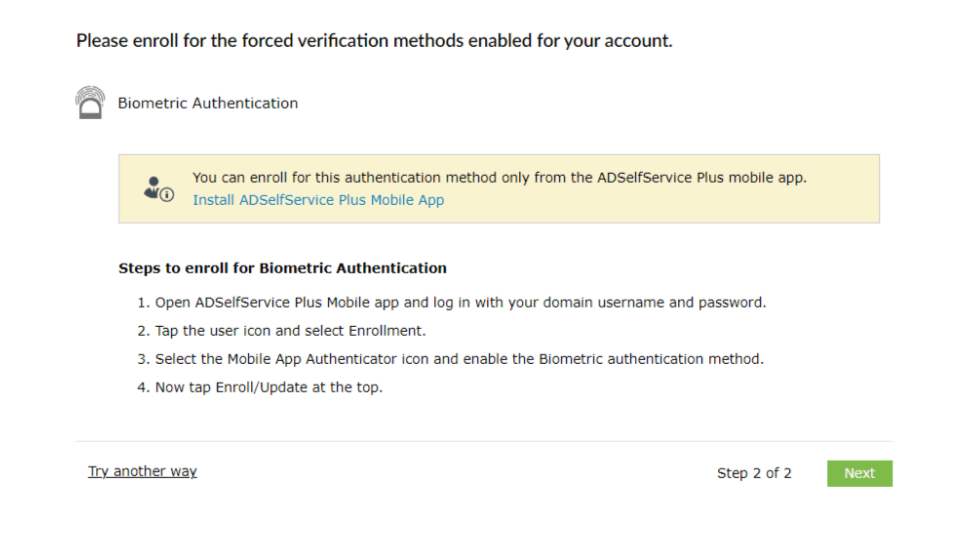
Enrollment using Fingerprint Authentication
- Log in to the ADSelfService Plus mobile app > click Enrollment → Fingerprint Authentication.
- Follow the steps displayed in the webpage.
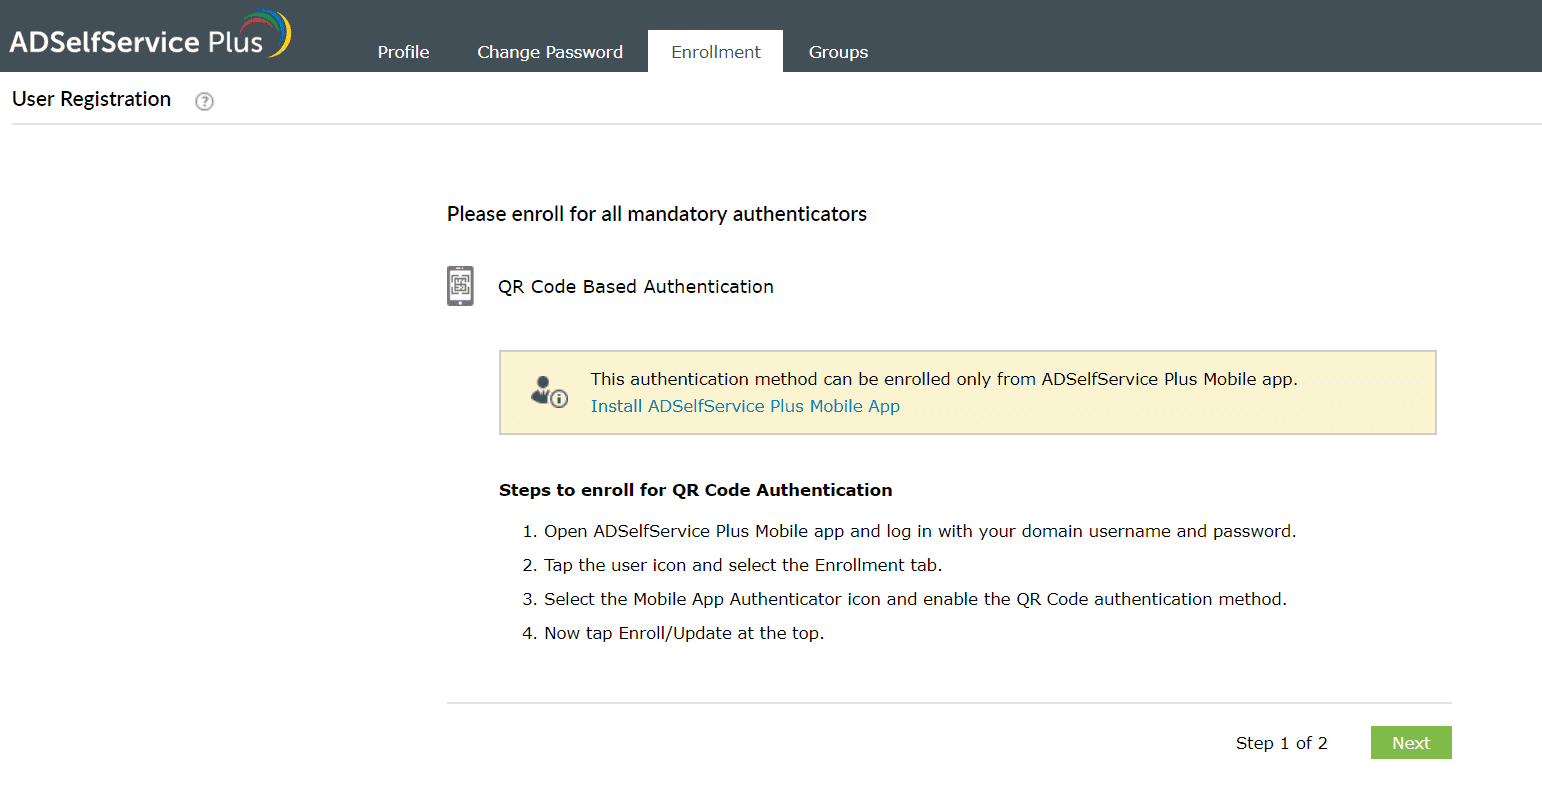
Enrollment using QR code Authentication
- Log in to the ADSelfService Plus mobile app > click Enrollment → QR code Authentication.
- Follow the steps displayed in the webpage.
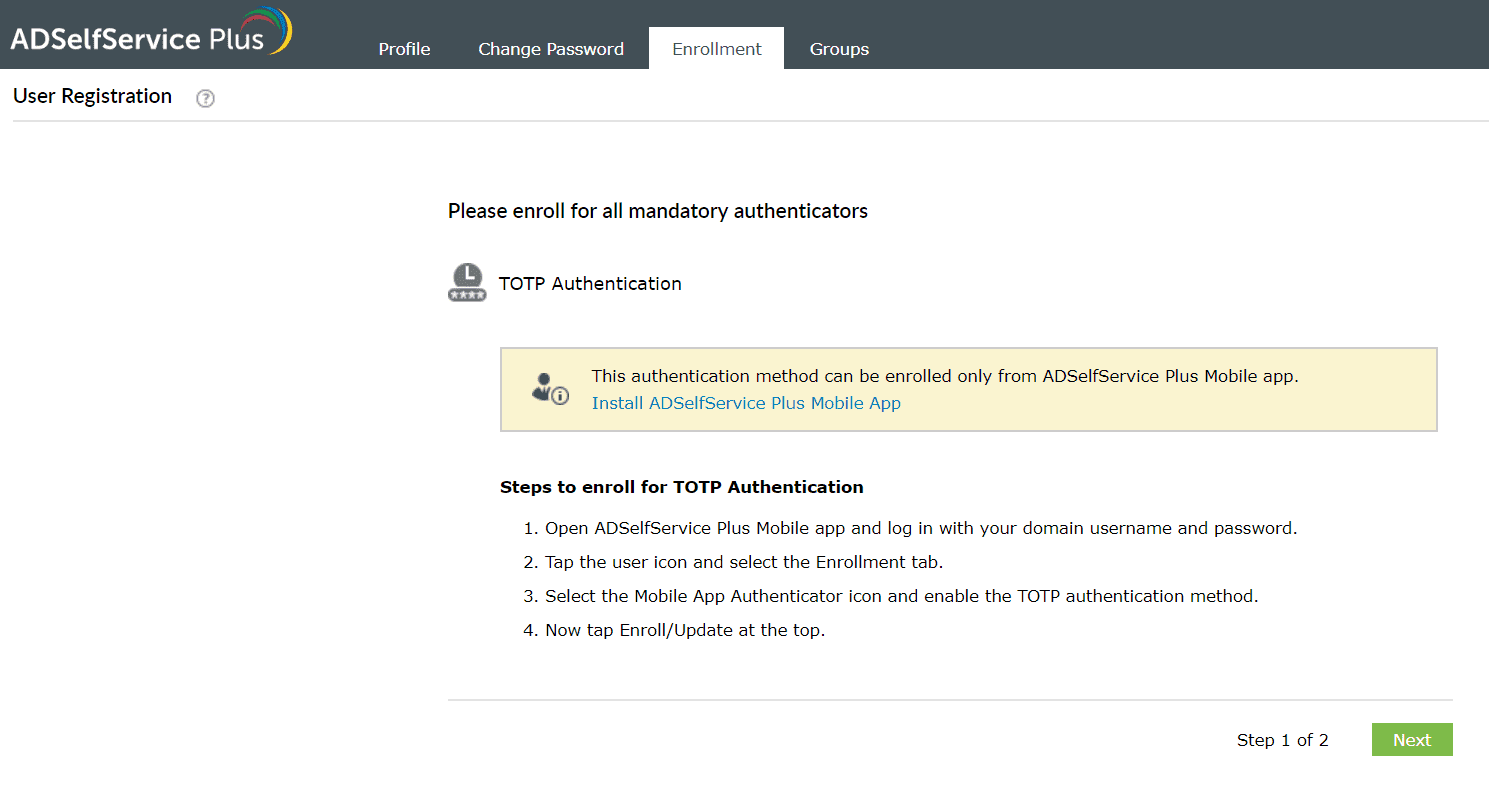
Enrollment using TOTP Authentication
- Log in to the ADSelfService Plus mobile app > click Enrollment → TOTP Authentication.
- Follow the steps displayed in the webpage.